Stepper controls are usually easy to prototype. The trickiest part is actually the expression used to change the actual stepper value. This is especially challenging when you are trying to increase/decrease a value inside a string that requires parsing, for instance “2 PX”, “3 Hours”, “4 Days”.
Let’s tackle this!
To create this stepper control we will not gonna use global variables for this. The reason for not using a global variable to handle the stepper value is because we want this component to be self-contained (without dependencies) to be easily reused inside the same project but also across other projects.
Prerequisites
To follow along, you’ll need to be a little bit familiar with Axure and have some understanding about widgets, interactions, local variables and expressions.
Also, if you haven’t done it yet, you can download Axure latest version from Axure Website.
What we will create
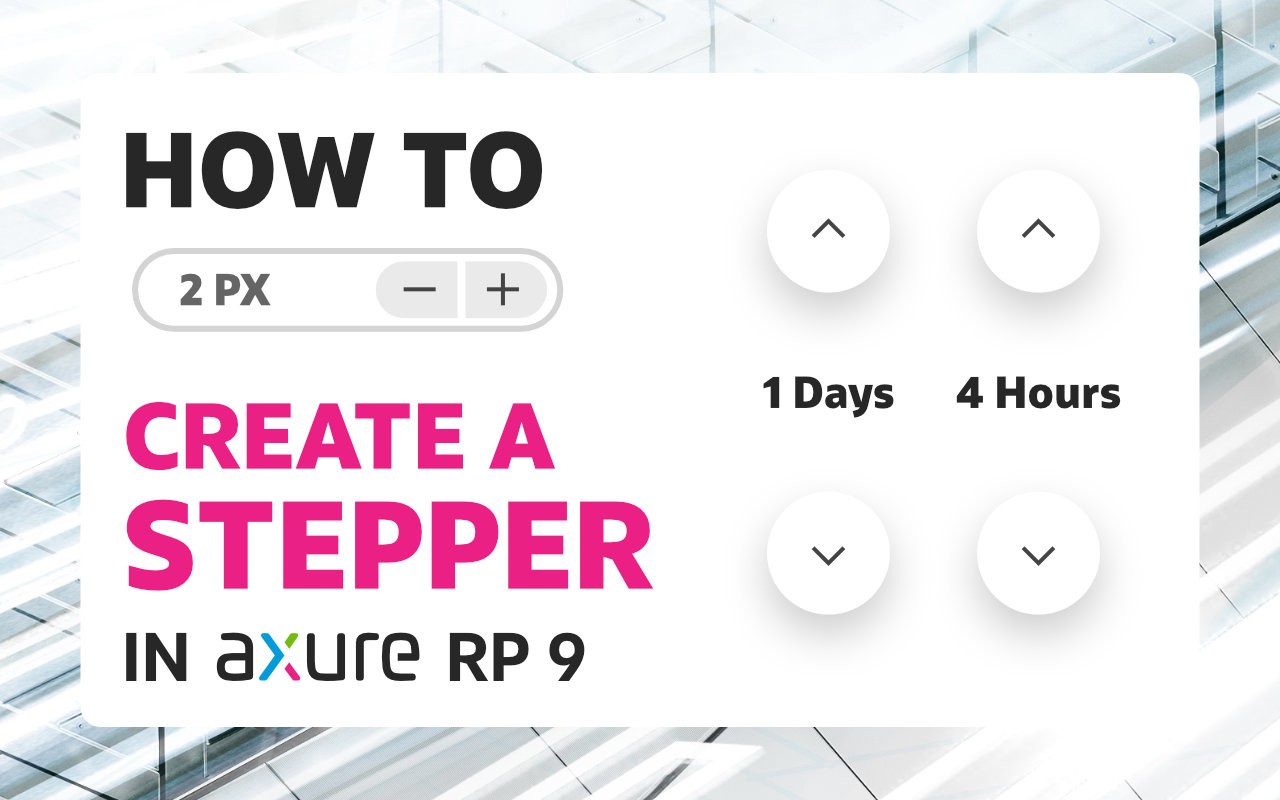
 We will create a vertical stepper control (a very well known input control pattern) used in mobile or desktop UI. There are multiple variations of this type of control but the principles shown here can be applied to any variation. This type of control allows the user to increase/decrease a value using dedicated buttons for up/down actions. The increment can also be a preferred value, in our case is 1. If you want to learn more about this control type you can take a look at the Apple HIG here: https://developer.apple.com/design/human-interface-guidelines/ios/controls/steppers/
To make everything work(on the interaction part), we will use a little bit of logic to respond to the Click/Tap event in order to change the stepper value.
Step by step instructions
The level of difficulty is easy to medium. Everything was broken into 3 steps (the last step is optional) so you can follow along more easily.
- Building the necessary shapes
- Adding interactivity
- Adding conditions for min/max
Step 1 — Building the necessary shapes
In this step we are going to create all the necessary shapes for our stepper control. To see an overview of the shapes and structure take a look at the image below.
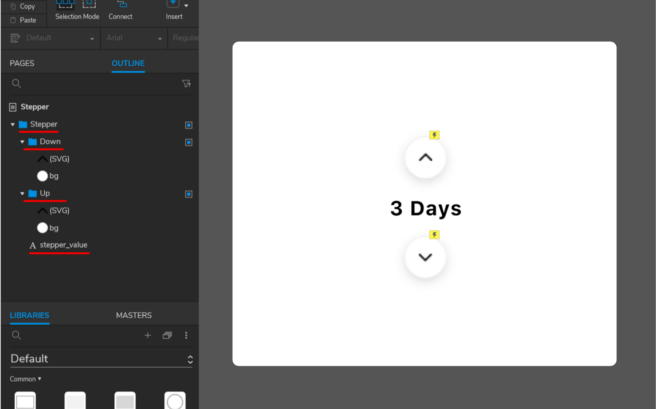
Basically, we have only one group called “Stepper” and inside we have:
- “Down” group — In this group we have only 2 simple shapes the down arrow which is an svg image and the “bg” ellipse shape to simulate the button appearance
- “Up” group — this group structure is similar to the “Down” group except the svg image is rotated
- “stepper_value” — this is actually the Label Widget that holds and display the “X Days” value
If you don’t have too much experience with Axure shape widgets then you can read more about them here: https://docs.axure.com/axure-rp/reference/shapes/.
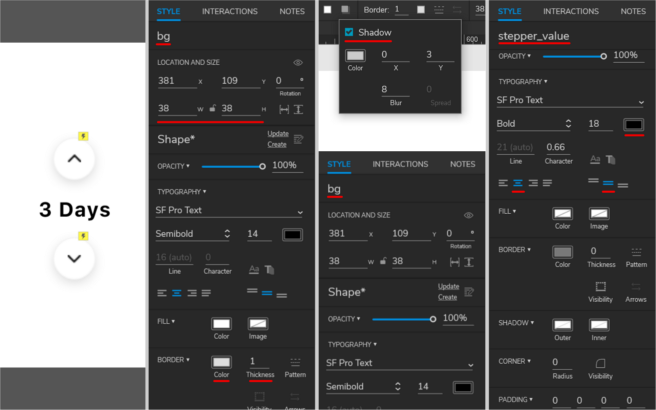
The main shape properties are available below (of course you can adjust these properties to fit your needs):
bg (for the Down/Up buttons):
- Width/Height: 38/38
- Fill: #FFFFFF
- Border: 1, #000000, opacity: 4%
- Shadow: fill: #000000, opacity: 12%, x: 0, y: 3, blur: 8
stepper_value:
- Width/Height: 117/28
- Fill: #000000
- Align center, Align middle
Step 2 — Adding interactivity
The only interaction that you are going to add is on the Down/Up Group widgets on the Click or Tap event. Basically, all we need to do is to set the text of the “stepper_value” widget to a new incremented value and this is achieved with a rather complex expression.
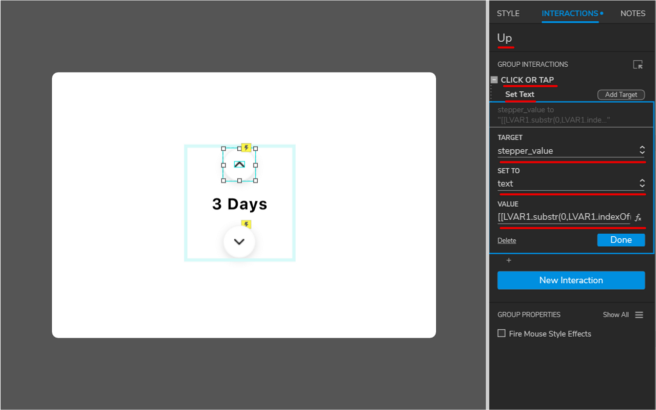
The Set Text action and its details are bellow:
- Action Set Text:
- Target: stepper_value
- Set To: text
- Value (for “Up” group): [[LVAR1.substr(0,LVAR1.indexOf(‘Days’)).trim() +1]] Days
Value (for “Down” group): [[LVAR1.substr(0,LVAR1.indexOf(‘Days’)).trim() -1]] Days
LVAR1 is a local variable and it represents the text on stepper_value.
If you are not really familiar with events, actions, cases you can read more about them on the Axure website https://docs.axure.com/axure-rp/reference/events-cases-actions/.
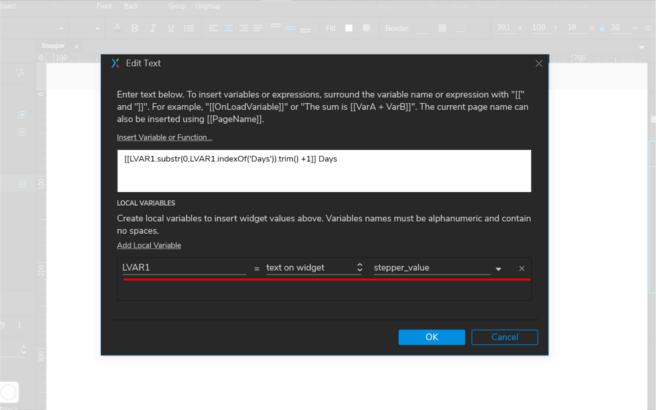
Before going further let’s take another look at our main expression that looks a bit complex but is not. Let me explain.
Expression: [[LVAR1.substr(0,LVAR1.indexOf(‘Days’)).trim() +1]] Days (in this expression the increment is 1 and is positive if we want to decrease the days all we need is to have a negative increment)
We make use of some String related functions like:
- substr(startNumberArgument, lengthNumberArgument) — returns a snippet of the string, starting with the character at the starting index and continuing until the specified length is reached
- indexOf(StringArgument) — returns the starting index of the first instance of the search value within the string the function is called on. If the search value isn’t found, returns -1
- trim() — this function takes no argument and removes all space characters from the beginning and end of the string
So, in other words the LVAR1.substr(0,LVAR1.indexOf(‘Days’)).trim() part will return the number 4 from “4 Days” then we will add 1 to 4 and at the end we add back the word “Days”. Easy right?
You can learn more about String related functions from here: https://docs.axure.com/axure-rp/reference/math-functions-expressions/#string-text
Step 3 — Adding conditions for min/max
If you need to make your stepper more realistic then you can add an upper/lower limit. So, let’s say that even if we hit the Down button forever we don’t go under the value 0 and the same for the Up button, we don’t go over the value 10.
To achieve this we will use conditions to execute interaction only in specific cases.
An overview of our new interactions are below.
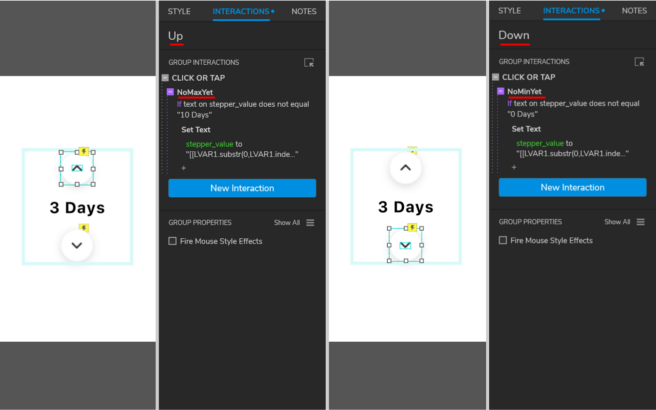
All right, so we have the same actions that are now executed only if the conditions are evaluated to true.
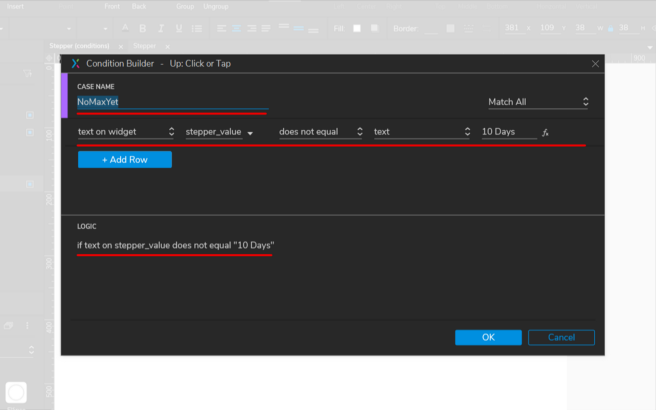
For the “Up” group the condition is: “if text on stepper_value does not equal to ’10 Days’”
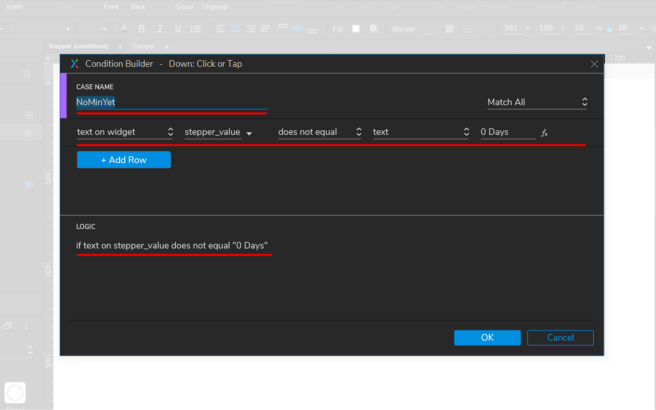
For the “Down” group the condition is: “if text on stepper_value does not equal to ‘0 Days’”
That’s it!
Creating a stepper control is easy in Axure, but the expression can be challenging. I hope this article helped you to easily tackle this kind of control. Now, you can use your new stepper control in future projects.
You can also download the Axure file from here: https://hi.switchy.io/1VEo
Original post you can find here: https://uxdesign.cc/how-to-create-a-stepper-in-axure-rp-9-4f46bbbcf53e