UX today has come a long way with tools like Axure. Here at Lightmaker, we try to push the envelope on these engines in order to provide our clients with a truly interactive experience that has opened the door to user-testing through our prototypes. Today, we will cover how to create a ‘Predictive Search’ that could be used in a user-testing scenario to determine how a user might navigate a site when looking for specific content. The Axure platform provides tools that allow us designers to create working elements like a predictive search that not only looks, but also works, like the real thing. Let’s get started, and you can view and interact with this prototype here: lightmakerusa.com/tmt/ux/predictive-search
Creating the search bar
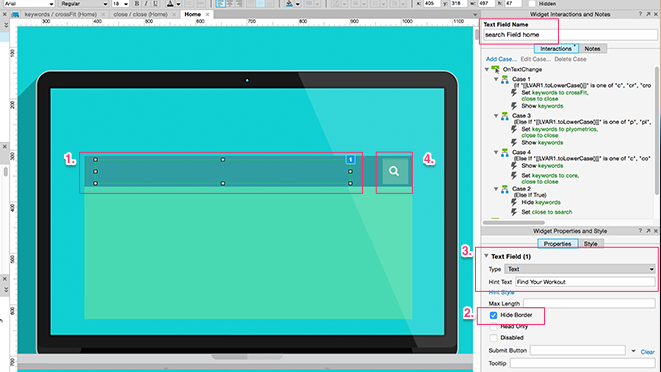
1. Using a few shapes, icons, and a text field, we created what looks like a search field and named it ‘search field home’.
2. With our text field selected, we checked the Hide Border radio button, in the properties panel, to make this search field blend in with our teal bar.
3. Within the ‘Hint Text Field’ in the properties panel, we entered ‘Find Your Workout’ to prompt our user to search for a specific workout.
4. Lastly, we created a dynamic panel with two states. The first state holds a ‘Search’ icon and the second state holds a ‘Close’ icon. This will act as a call to action to either search or close our predictive search.
Creating the Dropdown
In our example, we are using three keywords for our search bar to interact with: crossfit, plyometrics, and core. The user is able to start typing any of these three words into our search field to get a predictive dropdown to navigate pages within our prototype.
1. First, we created a Dynamic Panel we named ‘keywords’ that will work as our dropdown.
2. In this dynamic panel, we created three Panel States: crossfit, plyometrics and core.
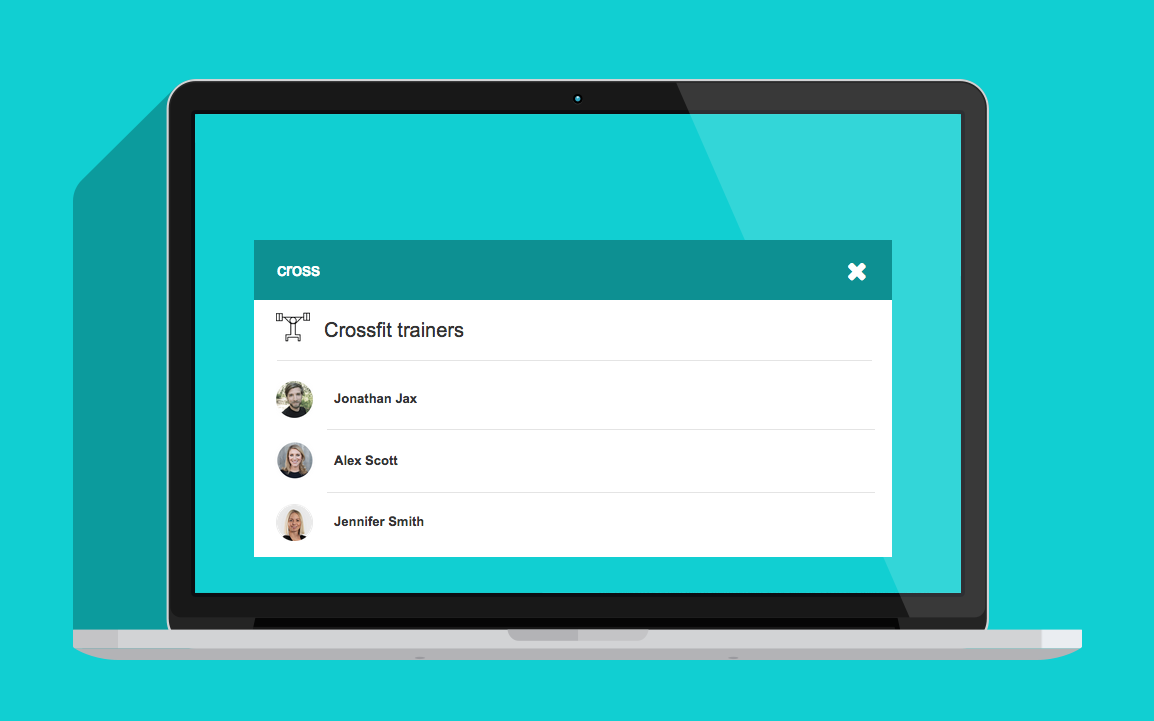
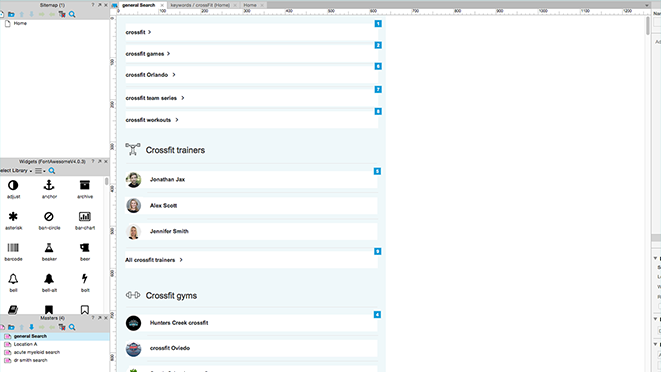
3. Inside each of these states, we created what looks like a dropdown of keywords that one might see if they searched ‘crossfit’ on our website. We added clickable keywords such as ‘crossfit games’ and ‘crossfit Orlando’, as well as organized sectioned keywords like ‘crossfit trainers’ and ‘crossfit gyms’ and made everything nice and pretty.
Adding conditional statements to our search bar
Now that we have our dropdown created we can give our text field multiple conditions that will allow our user to interact with the search field to show the different states of this dynamic panel.
1. ‘OnTextChange’ we added three separate interactions to our text field to account for all three of our keywords. Each keyword has their own ‘if’ statement telling it to show the corresponding panel states in our ‘keywords’ dynamic panel.
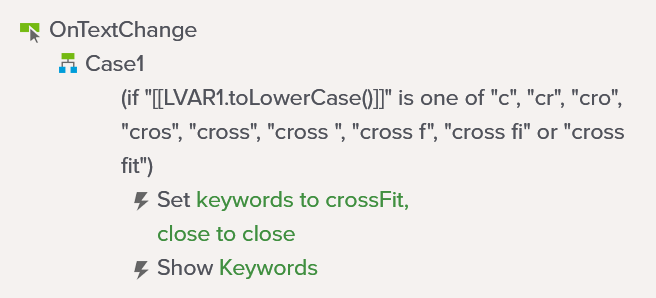
2. For ‘Case 1′ we told it, if the value of ‘search-field’ has any of the letters in the word ‘crossfit’ typed in, show us the ‘crossfit’ state of our ‘keywords’ dynamic panel and change our search icon to a close icon.
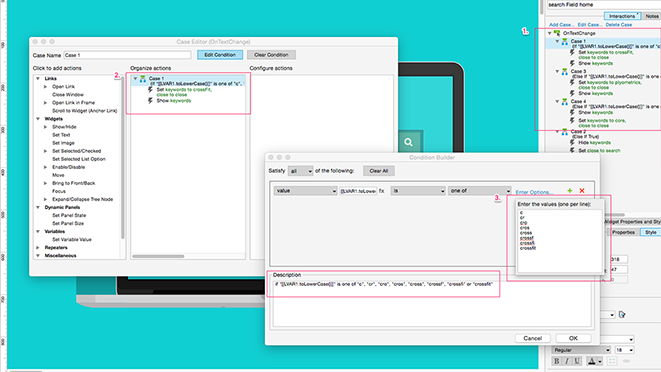
3. We did this by double clicking into our variable to open the case editor. Click the edit condition button in the case editor and enter the options “c”, “cr”, “cro”, “cros”, “cross”, etc.
4. Repeat steps 2 & 3 for ‘Case 2′ & ‘Case 3′ setting options for the keywords plyometrics, and core.
Lets take a closer look at this variable

Notice the Variable [[LVAR1.toLowerCase()]] was used to tell our text field to allow the user to type either lowercase or uppercase and still offer up the same panel state in our Dynamic panel. The extra code ‘.toLowerCase’ allows you to save time by not having to type upper and lowercase options in the case editor for each of the key words.
Finalizing our conditional statements
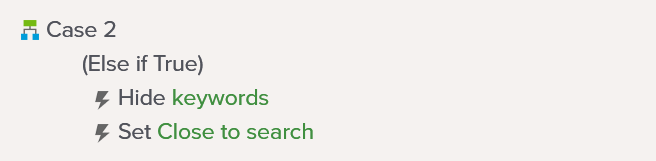
To finalize interactions to our search bar, we added an ‘else if true’ statement that closes the ‘keywords’ dynamic panel and changes the close icon back to the search icon. Now, if the user were to type in the wrong letter into our text field, e.g. a letter that is not in ‘crossfit’, the dynamic panel ‘keywords’ goes away until the incorrect letter is deleted from the text field, and at which time the dynamic panel will show up again.
Adding interactions to our Close icon
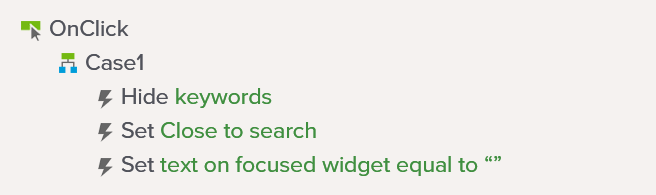
Finally, we added a click event to our dynamic panel that houses our ‘Close’ icon.
1. We told it to hide the ‘keywords’ dynamic panel.
2. Set the close icon back to the search icon.
3. Set the text on the text field back to our original ‘hint text’.
Now the user is able to close the predictive search and start their search over again.
Publish and enjoy!
That’s it! We now have an interactive predictive search you could use for user-testing. Of course, you could get crazy extensive with this… You could add as many keywords as you want, with a corresponding ‘panel state’ in your dynamic panel to match. You could also go as far as to add common misspellings of a particular word to make this even more user friendly, although that might be a bit overboard in this particular scenario.
As you can see, Axure gives you an array of tools to use when building a prototype that extends the possibility of true user-testing scenarios, going beyond the usual UX that clients are used to.
So, UX Designers, get creative and jump into Axure today to see what kind of predictive search you can build. Don’t forget to check in for future user-testing scenarios that we have built for you in Axure to push your prototyping skills to the next level!